Overview
Our GitHub integration ensures that your SDF workspace remains fully synchronized with your GitHub repository, enabling users to slot the SDF Cloud into their development process. Whenever new PRs are opened inside Github, SDF will automatically listen for new commits and update the SDF Cloud for your respective branches. This guarantees that the SDF Cloud catalog is consistently up to date, reflecting the latest changes in your code. The GitHub integration further enables you to view multiple branches and their catalogs and lineage graphs directly from within the SDF Cloud, giving you the ability to easily track, compare, and manage changes across different versions of your data models.Impact Analysis
Another benefit of integrating with GitHub is that this integration automatically enables our Impact Analysis functionality. When new PRs are opened inside GitHub, SDF will comment directly on that respective PR with a detailed summary of the impact your change makes to the entire data warehouse. This means that you can proactively understand how model changes affect your warehouse before merging your PR. This enables you to:- 📅 Track changes and understand their impact in real-time, allowing for more informed decision-making as your business scales.
- ⭐️ Ensure you aren’t creating overlapping models for your workspace that bloat your warehouse and increase compute costs.
- 🛠 Automate complex analysis that would traditionally require manual investigation, freeing up your data engineers to focus on more strategic tasks.
- 📈 Increase data accuracy and quality by proactively identifying potentially breaking changes.
- 🤝 Improve collaboration between data teams and stakeholders with clear, actionable AI-generated summaries of how your changes affect business-critical models.
- 💻 Seamlessly integrate into your pre-existing workflow with detailed comments right on your GitHub PRs.
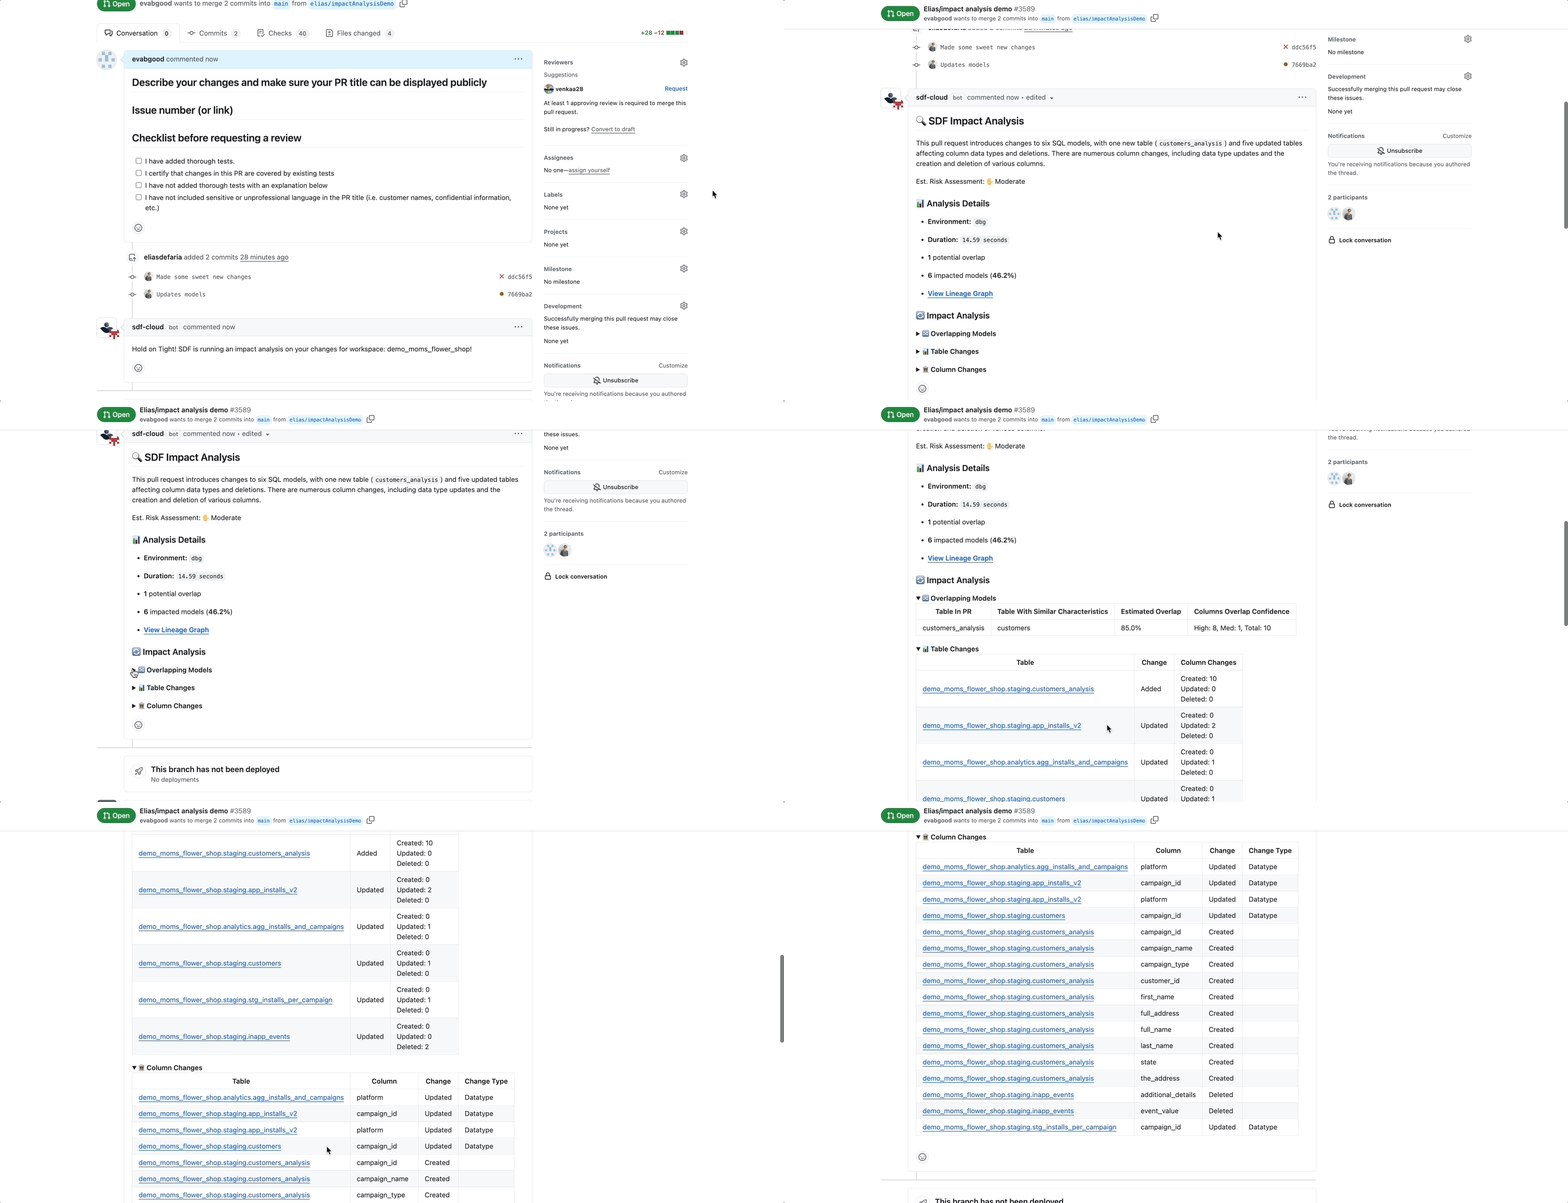
The Impact Analysis comment contains:
- An AI-generated summary of the impact of the PR, with an estimated risk assessment of either: Low, Moderate, High, or Critical
- The environment name, duration, number of overlapping models, number of impacted models, and a link to the respective lineage graph in the Cloud
- Models Overlap Analysis
- Table Changes
- Column Changes
Prerequisites
- A GitHub account with owner level access to the desired repository you would like to integrate.
- Admin level role within the SDF Cloud to configure integrations.
If you do not have appropriate GitHub access, you can still request access to the repository which will notify the GitHub repository owner to grant access.
Getting Started
1
Navigate to the Integrations and Link GitHub
- Navigate to your SDF global settings and locate the “Integrations” tab in the menu. Next, select the option to “Link GitHub”.
2
Authorize SDF with GitHub
- You will be redirected to GitHub to authorize SDF to access your GitHub repository. This step involves granting permission for SDF to act on your behalf, access resources, and verify your GitHub identity. Once SDF is authorized to work with GitHub, you will be able to select the repository or repositories you want to integrate with the cloud platform and grant access.
If you do not have the right permissions to install SDF in your repository, then you will need to request approval for installation from an account admin and wait for that approval to go through.
3
Connect Your GitHub Workspace
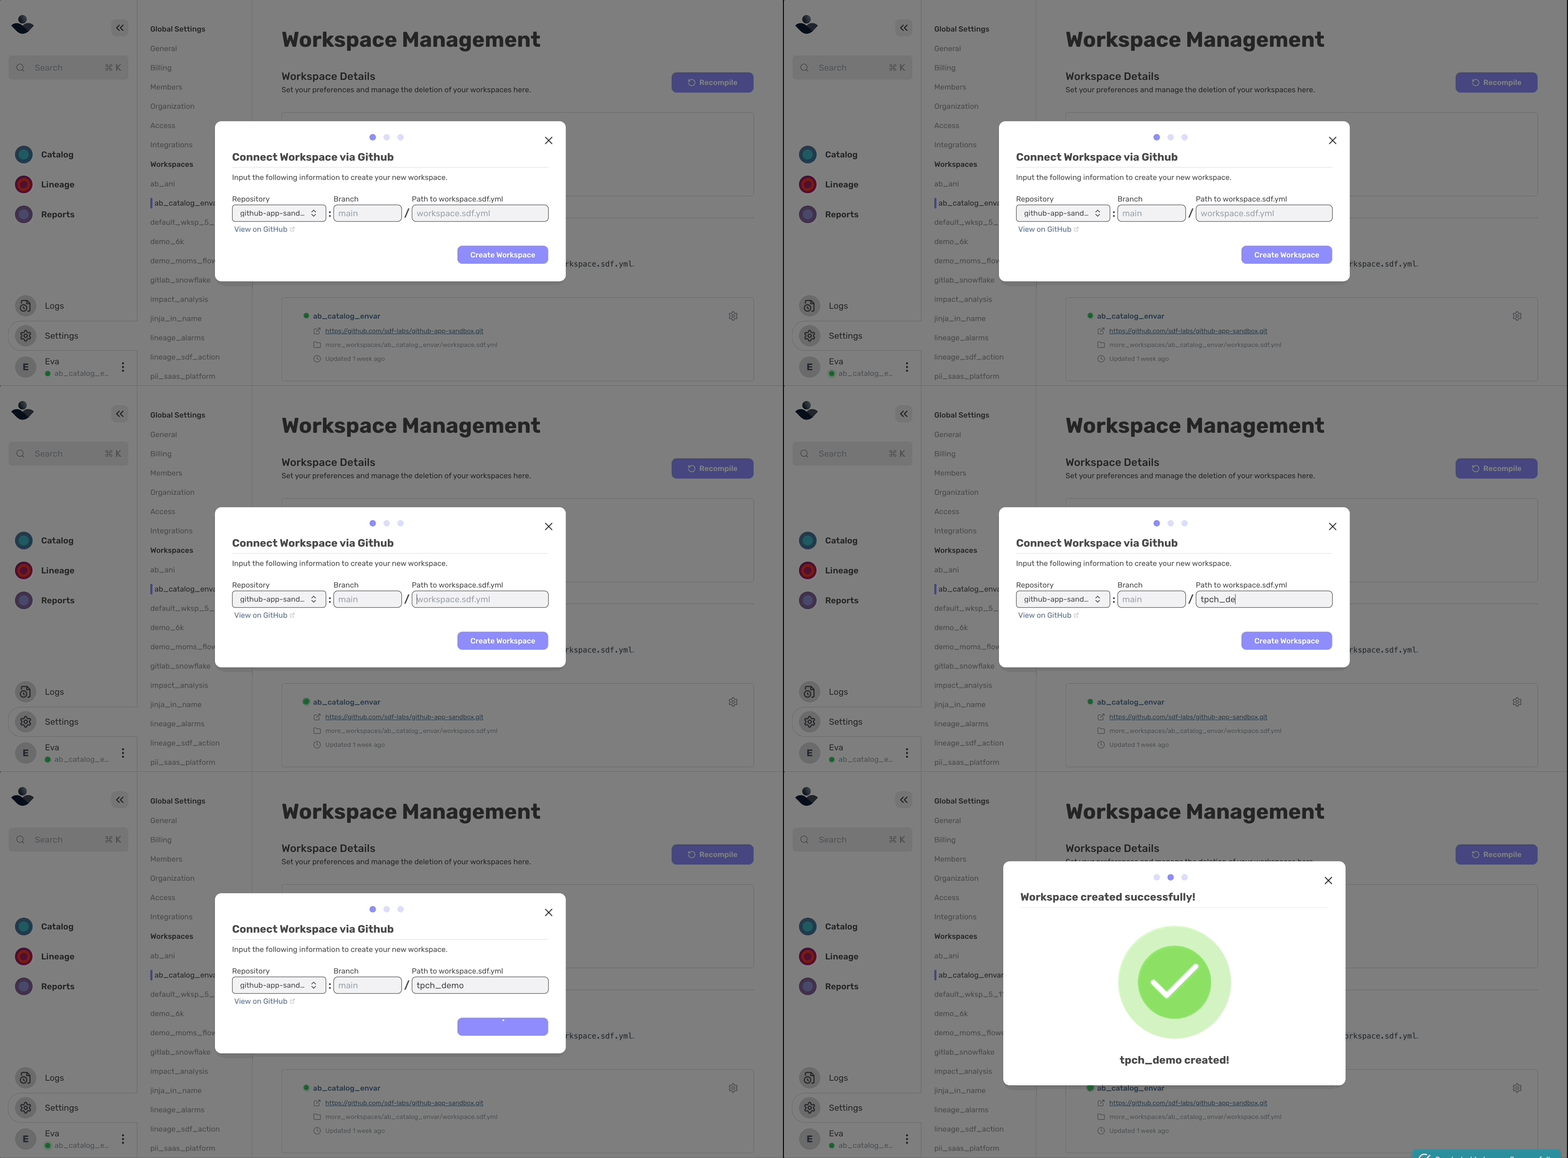
- After granting access, you will be redirected back to SDF Cloud and should see that the integration was successful. You will now be able to connect a GitHub workspace. Once you begin the flow to connect your workspace, you will be prompted to fill in the following fields:
- Repository: Select the repository you are integrating this workspace with.
- Branch: Input the branch you want to synchronize.
- Path: Input the path to the
workspace.sdf.ymlfile in your designated repository.- For example, if the repository looks like the output below:
- Then, to connect workspace 1, no input is necessary since the default path is the repository root.
- And to connect to workspace 2, the path would be
Workspace2foldername/
- For example, if the repository looks like the output below:
Repo Name
├── Workspace 1 Files
├── Workspace2foldername
│   └── workspace.sdf.yml
└── workspace1.sdf.yml
4
Optional: Add Environment Variables and Secrets
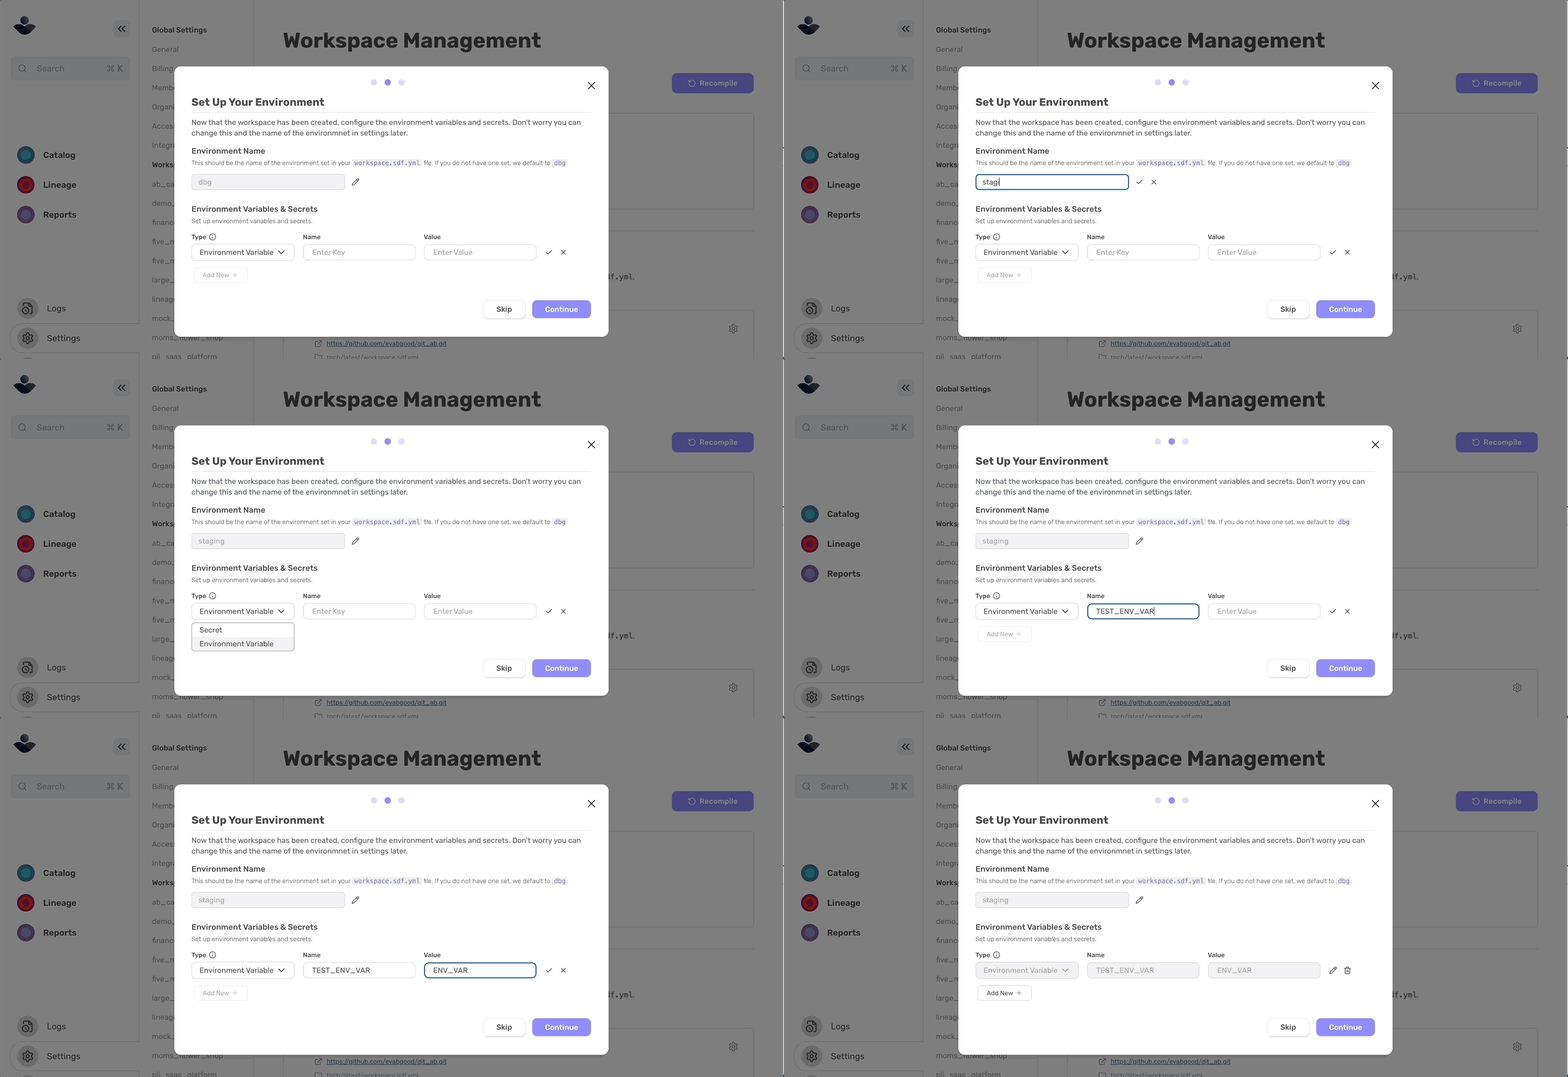
- You will then be prompted to optionally input environment variables and/or secrets while connecting your GitHub workspace. Access the Configuring Environment Variables and Secrets Guide to learn more.
5
Optional: Add Workspace Credentials
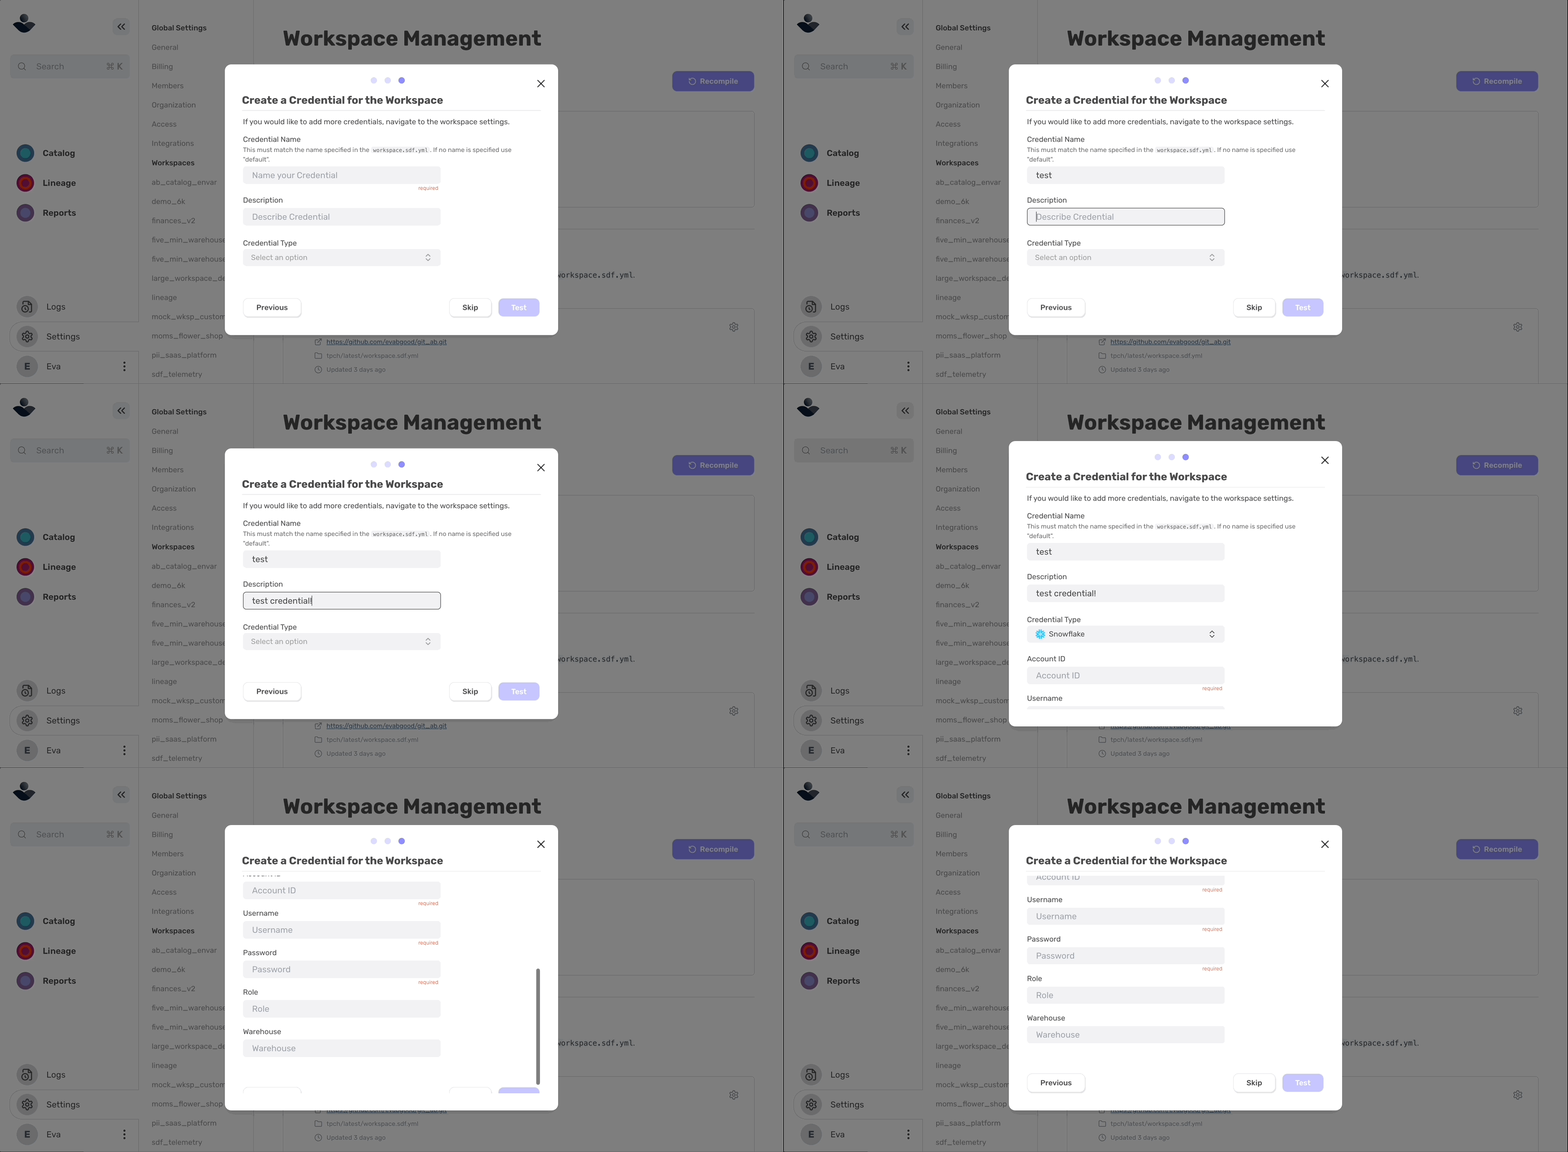
- You will also be prompted to optionally input workspace credentials while connecting your GitHub workspace. Access the Adding Workspace Credentials Guide to learn more.
6
Sync GitHub and View Your Integration
- Once the fields are properly filled in, click the ‘Sync GitHub’ button to synchronize your GitHub repository with the cloud platform. If you need to make changes, click ‘Edit Configuration’ to go back to GitHub and adjust your settings. Once synced, you will see the integration in the console.
When we say “synchronize” this just means the SDF cloud is running
git pull under the hood to fetch the latest changes from the main branch.7
Utilizing the Navigation Bar
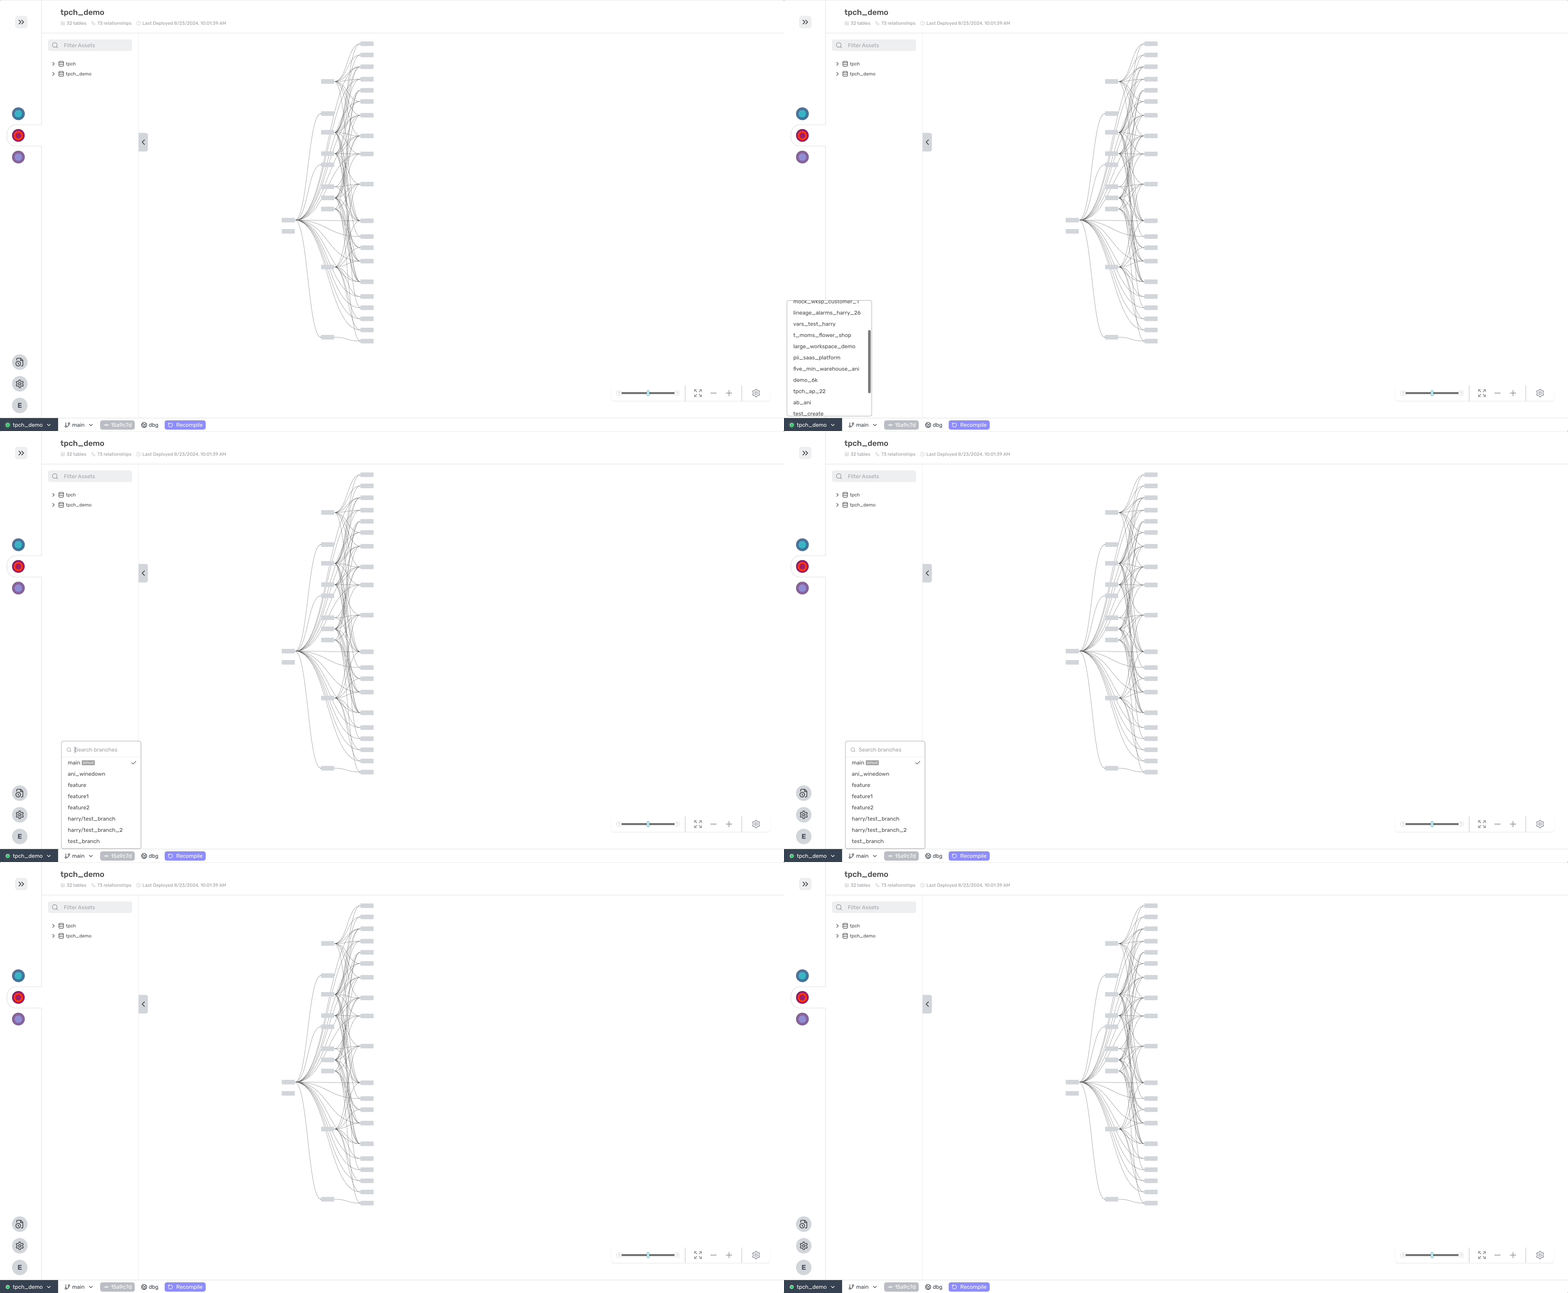
- Along the bottom of the screen, you will see your navigation bar which indicates:
- The selected workspace you are currently viewing and it’s health status
- The selected branch you are currently viewing and a sync button which will fetch the latest branches
- The GitHub Commit hash (which when clicked will take you to the latest compiled commit in GitHub)
- The environment for your workspace
- And you will see a button to recompile the workspace
If your branch has become stale, you should see an indicator in the navigation bar which will prompt you to recompile your workspace to view the latest changes.
8
Impact Analysis in the Cloud
Now that you’re integrated with GitHub, you should automatically start to see detailed comments from SDF Labs on all your GitHub PRs, showcasing the impact of the changes to your models.
If you would like to turn Impact Analysis off, navigate to your workspace settings and scroll to the “GitHub Integration” section. There you will find a toggle to disable impact analysis for your workspace. You can also disable the AI-generated summary that appears at the top of every comment.
Troubleshooting
- Authorization Fails: Ensure you have the necessary permissions on GitHub and try again.
- Permission Issues: Verify that you have granted access to the correct repositories.
- Integration Not Appearing: Refresh the page and check the integration settings.
- Compilation Failed:Check the logs for your workspace to find more extensive information on why compilation failed. You may need to re-sync with GitHub or recompile your workspace first. Finally, check the GitHub Status page to make sure Git systems are operational.
Still having trouble? Join our Slack community or email us at [email protected].